Question 23 of 48 from exam AZ-101: Microsoft Azure Integration and Security
Question
SIMULATION -
The following section of the exam is a lab. In this section, you will perform a set of tasks in a live environment. While most functionality will be available to you as it would be in a live environment, some functionality (e.g., copy and paste, ability to navigate to external websites) will not be possible by design.
Scoring is based on the outcome of performing the tasks stated in the lab. In other words, it doesn't matter how you accomplish the task, if you successfully perform it, you will earn credit for that task.
Labs are not times separately, and this exam may have more than one lab that you must complete. You can use as much time as you would like to complete each lab. NOTE: You will have to answer questions AFTER you complete the labs. Please be sure to manage your time so that you can complete all sections of the exam in the time allotted.
Please, note that once you submit your work by clicking the Next button within a lab, you will NOT be able to return to the lab.
To start the lab -
You may start lab by clicking the Next button
Tasks -
Click to expand each objective -
To connect to the Azure portal, type https:/portal.azure.com in the browser address bar.
Instructions -
Performance Based Lab -
This type of question asks you to perform tasks in a virtual environment.
The screen for this type of question includes a virtual machine window and a tasks pane.
The window is a remotely connected live environment where you perform tasks on real software and applications.
On the right is a Tasks pane that lists the tasks you need to perform in the lab. Each task can be expanded or collapsed using the "+" or "-" symbols. A checkbox is provided for each task. This is provided for convenience, so you can mark each task as you complete it.
Tasks -
Click to expand each objective -
-Configure servers
Add the "Print and Document Services" role to server LON-SVR1, installing any required management features and enabling both Print and LPD Services.
+Configure file and share access
When you are finished performing all the tasks, click the "Next' button.
Note that you cannot return to the lab once you click the "Next' button. Scoring occur in the background while you complete the rest of the exam.
Comments -
Once the exam completes, the comment period will begin and you will have the opportunity to provide comments to Microsoft about the exam questions. To launch the comment period, click the "Finish" and then "Comment" buttons. To skip the comment period and the exam, click Exit.
You can navigate to a question from the Review screen to provide a comment. Please, see the Review Screen tab in the Review Screen help Menu (which can be accessed from the Review Screen) for details on accessing questions from the Review Screen.
To comment on a question, navigate to that question and click the Give Feedback icon. When you have entered your comment in the comment window, click
Submit to close the window. To navigate to the Review screen again, click the Review button. You may navigate through all questions using the Next and Previous buttons. To skip commenting, go to the Review Screen by selecting the Review Screen button in the upper left-hand corner and from the Review Screen, select
"Finished".
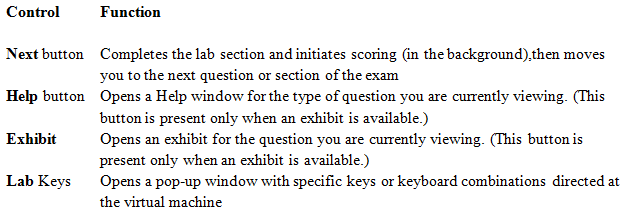
Controls Available -
For any question, one or more of the following controls might be available.
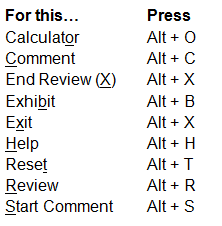
Keyboard Shortcuts Available -
Exam features may be accessed using keyboard shortcuts. The following table describes the keyboard shortcuts that are available during this exam.
Some keyboard shortcuts require that you press two or more keys at the same time. These keys are separated by a plus sign (+) in the table below.
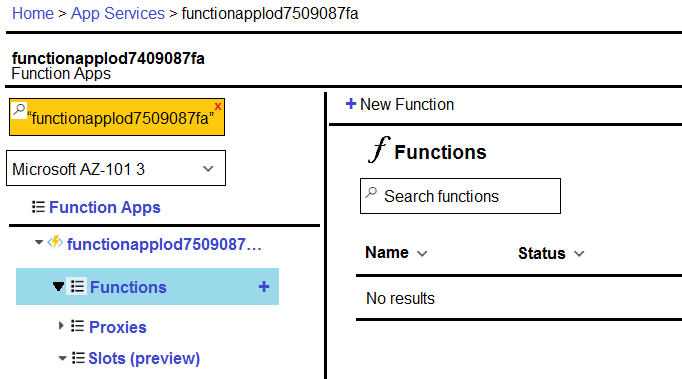
You recently deployed a web app named homepagelog7509087.
You need to back up the code used for the web app and to store the code in the homepagelog7509087 storage account. The solution must ensure that a new backup is created daily.
What should you do from the Azure portal?
Explanations
See explanation below.
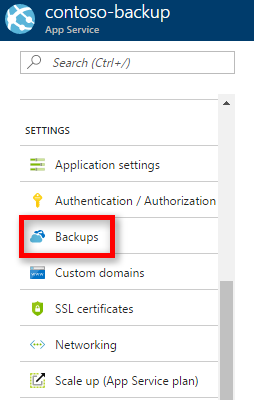
Step 1:
Locate and select the web app homepagelod7509087, select Backups. The Backups page is displayed.
Step 2:
In the Backup page, Click Configure.
Step 3:
In the Backup Configuration page, click Storage: Not configured to configure a storage account.
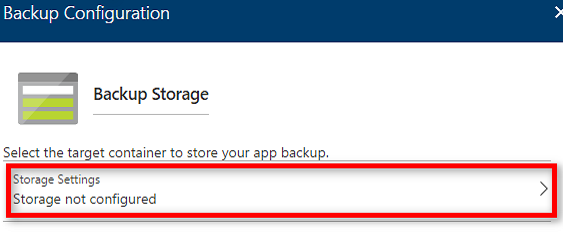
Step 4:
Choose your backup destination by selecting a Storage Account and Container. Select the homepagelod7509087 storage account.
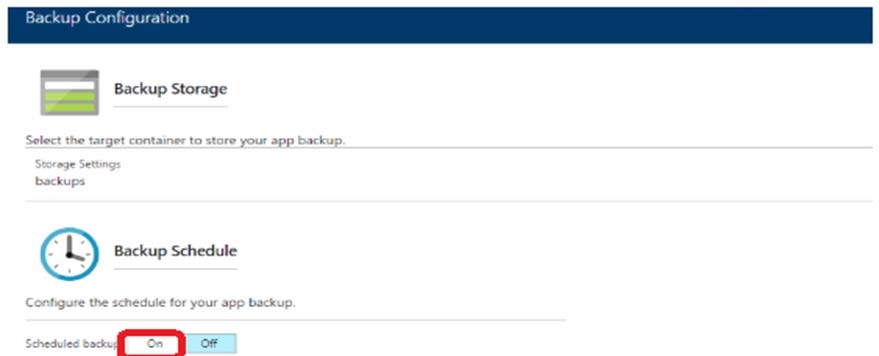
Step 5:
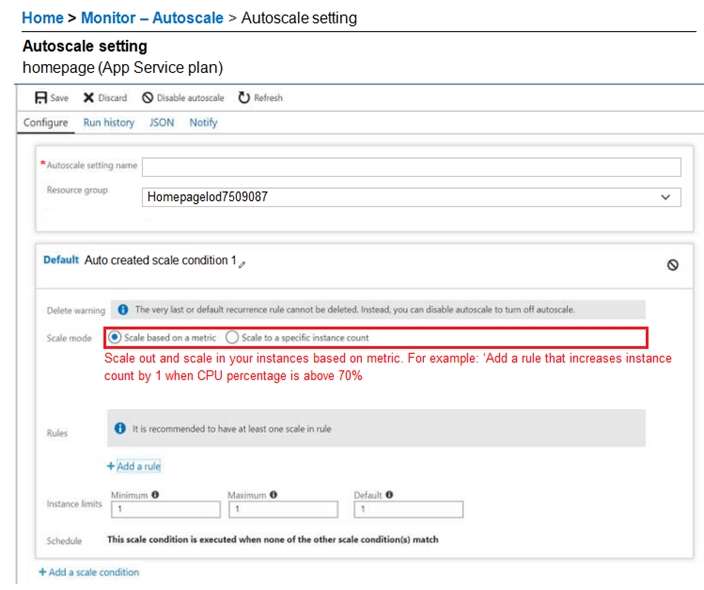
In the Backup Configuration page that is still left open, select Scheduled backup On, and configure daily backups.
Step 6:
In the Backup Configuration page, click Save.
Step 7:
In the Backups page, click Backup.
https://docs.microsoft.com/en-us/azure/app-service/web-sites-backup