Prevent Connections from IP Address in Azure Portal
Question
SIMULATION -
This is a lab or performance-based testing (PBT) section.
The following section of the exam is a lab. In this section, you will perform a set of tasks in a live environment. While most functionality will be available to you as it would be in a live environment, some functionality (e.g., copy and paste, ability to navigate to external websites) will not be possible by design.
Scoring is based on the outcome of performing the tasks stated in the lab. In other words, it doesn't matter how you accomplish the task, if you successfully perform it, you will earn credit for that task.
Labs are not timed separately, and this exam may have more than one lab that you must complete. You can use as much time as you would like to complete each lab. But, you should manage your time appropriately to ensure that you are able to complete the lab(s) and all other sections of the exam in the time provided.
Please, note that once you submit your work by clicking the Next button within a lab, you will NOT be able to return to the lab.
To start the lab -
You may start lab by clicking the Next button
Tasks -
Click to expand each objective -
To connect to the Azure portal, type https:/portal.azure.com in the browser address bar.
Another administrator reports that she is unable to configure a web app named corplod7509086n3 to prevent all connections from an IP address of 11.0.0.11.
You need to modify corplod7509086n3 to successfully prevent the connections from the IP address. The solution must minimize Azure-related costs.
What should you do from the Azure portal?
Explanations
See explanation below.
Step 1:
Find and select application corplod7509086n3:
1. In the Azure portal, on the left navigation panel, click Azure Active Directory.
2. In the Azure Active Directory blade, click Enterprise applications.
Step 2:
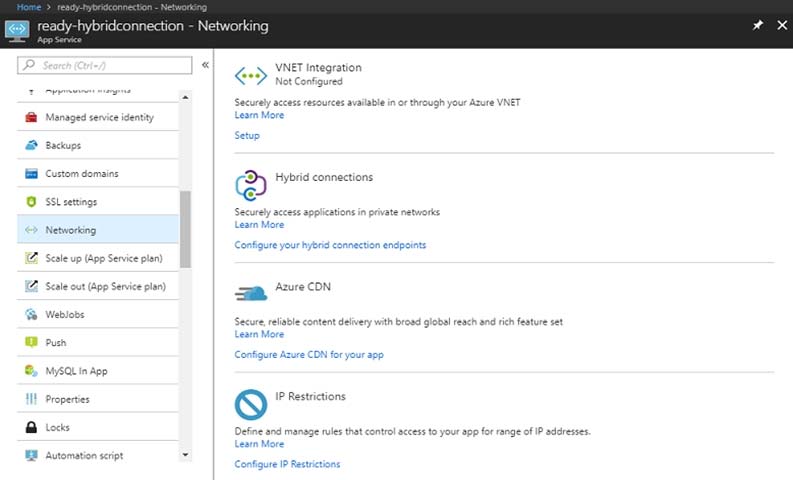
To add an IP restriction rule to your app, use the menu to open Network>IP Restrictions and click on Configure IP Restrictions
Step 3:
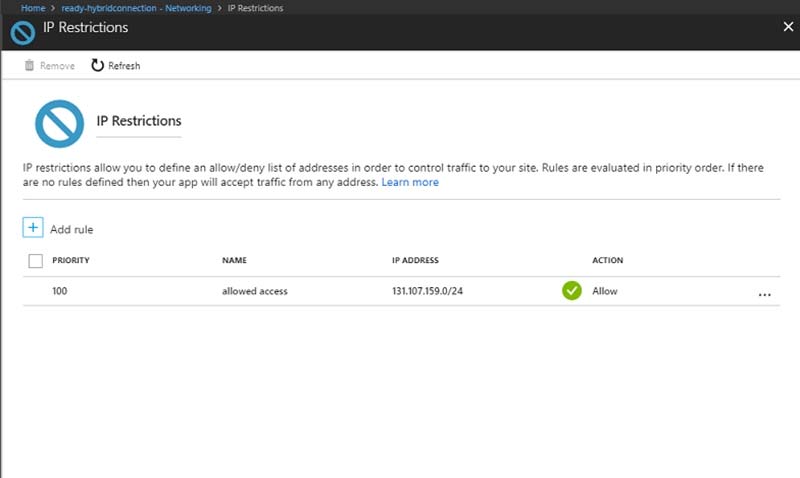
Click Add rule -
You can click on [+] Add to add a new IP restriction rule. Once you add a rule, it will become effective immediately.
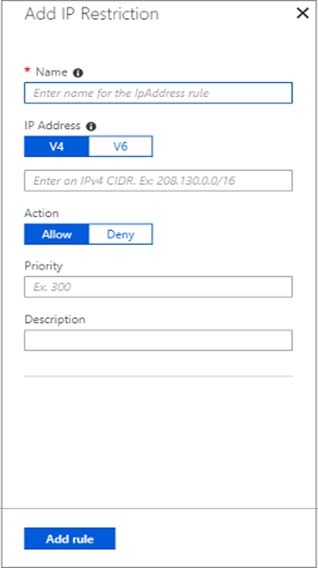
Step 4:
Add name, IP address of 11.0.0.11, select Deny, and click Add Rule
As an AI language model, I am not able to perform lab simulations. However, I can guide you through the steps required to complete the task mentioned in the question.
To modify the web app corplod7509086n3 to prevent all connections from an IP address of 11.0.0.11, you can follow these steps:
- Log in to the Azure portal by typing https://portal.azure.com in the browser address bar.
- In the search bar at the top of the portal, type the name of the web app, corplod7509086n3.
- Select the web app from the search results.
- In the left-hand menu, select Networking under the Settings section.
- Under the Firewall section, click on the Add rule button.
- In the Add inbound rule window, enter the following details:
- Name: BlockIP
- Description: Block connections from a specific IP address
- Action: Deny
- Priority: 100
- IP address: 11.0.0.11/32 (this will block all traffic from this IP address)
- Click on the Add button to save the rule.
- Save the changes to the web app.
With these steps, you have successfully modified the web app to prevent all connections from the IP address of 11.0.0.11. This solution minimizes Azure-related costs because you only added a rule to the existing firewall configuration of the web app, instead of creating new resources.